 |
|
| www.silomdental.com |
|
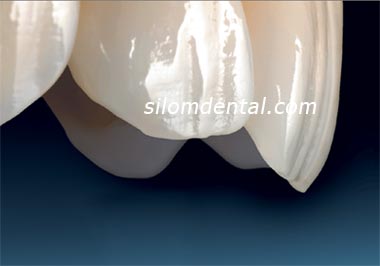
Empress® Esthetic Veneer |  |
Empress® Esthetic Veneer
The new IPS Empress Esthetic Line offers heightened aesthetics, enhanced properties and cost
effectiveness for the Staining Technique and partially layered veneers. With the new IPS Empress Esthetic Line for veneers, the product family
has been further enhanced. The result is an extremely homogeneous leucite glass-ceramic, which features nature light scattering and
offers a balanced chameleon effect. Due to an increased density and homogeneity of the crytals, the restorations blend beautifully into the nature surroundings.
If possible, the preparation should be entirely located within the enamel. Two techiques are available:
the first involving a simple incisal reduction without reduction of the incisal edge and the other a classic preparation with lingual-incisal,
chamfer-like preparation of the incisal edge. Margins should not be located in the occlusal contact areas.
The dimension of the incisal reduction depends on the desired degree of translucency of the incisal area to be restored.
The more transparent the incisal edge of the veneer should appear, the more reduction is required. An incisal reduction of at least 1 mm is recommended.
By providing depth grooves using the appropriate burs, controlled enamel reduction can be achieved. The minimum preparation thickness is approx. 0.6 - 1 mm depending on the preparation technique chosen.
Eliminating proximal contact is not necessarily required. Discoloured teeth may require more extensive reduction to allow for adequate masking. A cervical chamfer should be prepared.
Step by Step Empress Esthetic Veneer

1.Preoperative view : | 
2.The old composite build-up also comprises the palatal part of the incisal edge. |

3.Veneer preparation with palatal embrasure of the incisal edge after removal of the restoration. The tooth is prepared for adhesive cementation. |

4.Preparation of the IPR Empress Esthetic veneer : |

5.Apply Monobond-S for 60 seconds on the inner aspects and dry. | 
6.Etch the enamel for at least 30 seconds with the Total Etch phosphoric acid etching gel. |

7.Etch the dentia for at 10-15 seconds with the Total Etch phosphoric acid etching gel. |

8.Subsequently, rinse the phosphoric acid with water spray. |

9.Next, apply dry moisture-free air across the surface to remove excess moisture. The dentin should remain slightly moist. |

10.Apply Excite DSC adhesive on the slightly moist dentin. |

11..Apply Excite DSC adhesive also on the enamel and disperse with air. |

12.If a light-curing only resin cement used, light cure Excite DSC prior to placement. |

13.Place the veneer with Variolink II and light cure.. |

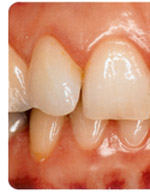
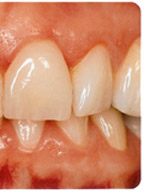
14.Palatal view of the veneer on tooth 21. |

15.The inserted veneer in tooth 21. Note th translucency of the incisal edge. |
|
|
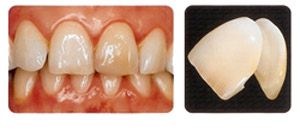
Before and after restoration with
IPS Empress Esthetic |
|||
HOME
l SERVICE
l DENTISTS
l TECHNOLOGY
l FACILITIES
l ABOUT US
l SITE MAP
PROMOTION
l PRICE&DURATION
l CONSULTATION
l FAQ
l LINKS
l MAP
l TESTIMONIALS
l OUR LAB
DENTAL BRACES
l LASER TOOTH WHITENING
l IMPLANT DENTISTRY
l ENDODONTICS
l OPERATIVE DENTISTRY
l SEDATION DENTISTRY
COSMETIC DENTISTRY
l PROSTHODONTICS
l PERIODONTICS
l ORAL SURGERY
l PAEDODONTICS
l GP & ORAL EXAM
l OCCLUSION
...............................................................................................................................................
MAKE SURE OF YOUR SMILE. Copyright© 2004 SILOM DENTAL BUILDING. All Rights Reserved.
Local Call : 0 2636 9092-5,
International Call : (+) 66 2636 9091, (+) 66 2636 9097
e-mail :
silomdental@silomdental.com


